Friday, October 30, 2015

Tree House: 10/30/15

10/30/15

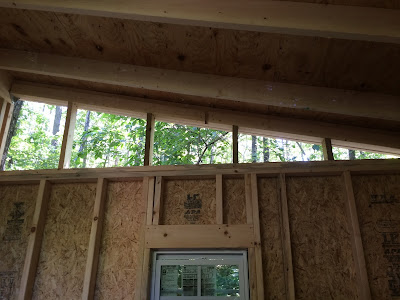
Over the last week or so, I've had it in my head that I'd like to be finished by Halloween. Well, I'm close! I've trimmed out the windows, laid the floors, installed a ceiling fan, completed the loft and even started to move some knickknacks into the space! The only thing remaining to do is build the ladder to the loft (maybe this weekend!?). I...AM...EXHAUSTED...but totally satisfied with the progress.


HAPPY HALLOWEEN, Y'ALL!!


Thursday, October 22, 2015

Tree House: 10/16-10/22

10/16-10/22

It took a healthy portion of 6 days (less on work days) to wall the tree house. I opted to use a tongue and groove 1 x 8 knotty pine board in lieu of my originally planned 4' x 8' beadboard panels. I figured the deliberate install of one board, one after the other, would be easier on the solo installer (especially when it came to the ceiling) than hoisting the monster panels. Going with the individual install of boards also paid off when it came to cutting around gangboxes and fixture rounds. It certainly took longer than panels; but the end result can not be argued with. It looks really good!

My first wall...honing in my technique:


Creeping up the side walls:


Window cuts were easy. Negotiating the loft was a pain!


Wrapping the loft and the angled cuts on the sides of the shed inclined ceiling were also challenging:


Moving up the ceiling and cutting around a future fixture:


Finally! The end result! A knotty pine haven in the trees!


Some window / door trim and flooring are next! Stay tuned!

Thursday, October 15, 2015

Tree House: 10/15/15

10/15/15

DONE! DONE! DONE! The exterior is done! The fabulous father-son crew of AIRtight Windows (They also paint) finished painting and staining the tree house today. They did a fantastic job. I highly recommend working with them on just about any home maintenance item (they also painted our main house and did some carpentry work). You can email them at linrg@comcast.net, or call 770-642-1754. Here are the pics:


I picked up an Expedition fulls worth of tongue and groove paneling on Monday. Walling the interior is next!

Wednesday, October 14, 2015

Tree House: 10/11 - 10/12

10/11 - 10/12

Because I have nothing better to do than dream up paranoid catastrophe conditions while not sleeping at 3 in the morning, I decided to make "erosion proof" the concrete footers supporting the tree house. You see, during heavy rain, the lower 2 posts see some flash flooding. To date, the normal flow of run-off has shown no sign of eroding the footers. After all, they are 3+ ft deep! Still, I'd rather be safe than sorry; and the recent rains we've seen had me thinking about this condition more than I'd like to admit!

Lucky me! The fantastic painters that have been working on my main house offered me some old landscape timbers they procured from another job. They were a little worn, but perfect for re-purposing in my little project.


I even had enough timber leftover to offer "Momma" hickory some root erosion protection:


Pretty purple 'shroom!


And the painters are getting started!


Tuesday, October 6, 2015

Tree House: 10/6/2015

10/6/15

I received a visit from the amazing crew at Foam South Insulators this morning! They made short and efficient work of insulating the tree house with a closed cell foam product that essentially put the project on par with an ice cooler! This foam is adept to the conditions down in the woods. It is providing an air-tight and waterproof seal for the structure. Also, it is mold resistant and actually contributes to the structural integrity of the build. I couldn't be happier with the installation! Definitely hit these guys up if you are in the market for home insulation. I hear that doing something as simple as spraying the rafters in your attic can have a significant impact on your energy usage.


"NO, clandestine government agency, E.T. is NOT hiding in my tree house!"


Looks like I'm ready to put the wall panels up! Check out the tight install!


Tuesday, September 22, 2015

Tree House: 9/22/2015

9/22

The sloped trail to the tree house is at a bit of an incline. Add in the nuts, and it can sometimes feel like walking on marbles! The following solution is a mini-project (evidently, I have to do something physical every day now. I'm strung out on tree house building!)


Sunday, September 20, 2015

Tree House: 9/18 - 9/19

9/18 - 9/19

Seeing all of this costly siding scrap pile up has been maddening. I decided to make the most of it by patch-working the neglected bits into a sub-floor. Ultimately, there will be some type of laminate product laid down. For now, this will do as the step up from just having open slat decking under foot. Also, it gave me an application for left over roofing tar paper:


Then it was on to the loft. One day, there will be a ladder:


It's wide enough for 2 adult size camping pads. Of course, there will be a protective railing. I'll install it once I've applied all of the finished wall board.

Wednesday, September 16, 2015

Tree House: Week of 9/13/15

Week of 9/13/15

It took 17 hrs over the course of 4 days to complete the deck railing. There were some weird, inside angles to contend with, but the end result is solid as a rock!

Had to cut 14 of these notched rail posts:


A slow and deliberate progression:


Here are some of those wonky angles:


Almost done and just prior to adding the finishing touches, the 2x6 hand rails:


Here is the completed product! She should get a paint job and a deck staining within the week. After that, the exterior is officially COMPLETE!


Friday, September 4, 2015

Tree House: Week of 9/1/15

Week of 9/1/15

This week turned into a busy work week. I was only able to carve out 1 & 2 hour windows over the course of the last 4 days to focus on the tree house. Over the course of this week, I was able to complete all exterior trim (corner seams, horizontal seams, roofline seams, windows and the door) and apply a soffit under the top lip of the roof (keep weather from blowing back in under the roofline). With deck railing and exterior painting the exception, I think this marks the completion of the exterior of the structure!!


Thursday, August 27, 2015

Tree House: 8/25-8/27

8/25 - 8/27

It has been so nice out the last few days! I had to carve out some tree house time! Here is a quick pic inventory of what has been accomplished.

Finally began work on siding the missing, upper portions of the exterior. I had to install a piece of metal flashing, a drip rail, between the lower and upper pieces of siding. It's very visible in this pic. This type of flashing was ultimately installed all around the perimeter of the house. Here is the section above the door completely sided!:


Before I could install siding on the triangular openings, I had to build out "scabs" of wood for the sole purpose of providing a nail backing to the siding installation. Angles, sawing, blah, blah, angles, sawing...:


For a brief reprieve from all the carpentry, I installed a door handle and a keypad dead bolt. Beep, Borp, Boop, Beep!:


In one last dash for the "dry-in", I completed all cuts and death defying, tipsy ladder installation of all siding! We are now officially "Dried-In". She is not the prettiest just yet, but she'll take weather until I can get around to trimming out the exterior corners & highly exposed siding seams. Then it will be on to deck railing and exterior painting. This will set the stage for turning my sights to completing the interior!